4.2 Import: Creating and Importing CSV files

Table of contents
4.2.0 Import: Creating and Importing CSV files
Import files are for inputting data into SkooCloud. Incoming data requires attribute codes to exist in SkooCloud so that it has something to map to. If the attribute does not exist, SkooCloud will simply not be able to import the data against a product.

4.2.1 SkooCloud Basic users
For Basic users, your core data (product codes, attribute codes and values) comes from your DataBridge. If you would like to upload additional custom data (attributes codes and values), you will need to upgrade to Plus or Enterprise. The rest of this chapter is not applicable to Basic users.
4.2.2 SkooCloud Plus or Enterprise users WITH a DataBridge
For SkooCloud Plus and Enterprise users with a DataBridge, your core data (product codes, attribute codes and values) comes from your DataBridge, and any custom data (attributes codes and values) is imported into SkooCloud via the import tool.
Before you import custom data into SkooCloud, you need to make sure you have set up your additional/custom attribute codes, so that the data can assign itself to the right attribute and product on import (see section 4.6). Once these are in place, there are two ways to import this custom data, either by using an import template or manually (see section 4.2.4).
SkooCloud Plus users can create up to five import templates which can be re-used. Enterprise users can create unlimited templates.
4.2.3 SkooCloud Plus or Enterprise users WITHOUT a DataBridge
For SkooCloud users that don’t use a DataBridge (required for PixSell and InterSell), all your data will come from a CSV import file.
Before you import any data into SkooCloud, you need to make sure you have set up your attribute codes, so that the data can assign itself to the right attribute and product on import (see section 4.6). Once these are in place, there are two ways to import this custom data, either by using an import template or manually (see section 4.2.4).
Plus users can create up to five import templates which can be re-used. Enterprise users can create unlimited templates.
4.2.4 Import tools: Manually importing your data
The best way to understand the import tools is to create a demo scenario. Here we have some new data that we would like to import against some products in the PIM.
We have a new attribute called ‘Artist’ for greeting cards. Ensure you save this Excel file as a CSV file and save it in an accessible location ready for upload:

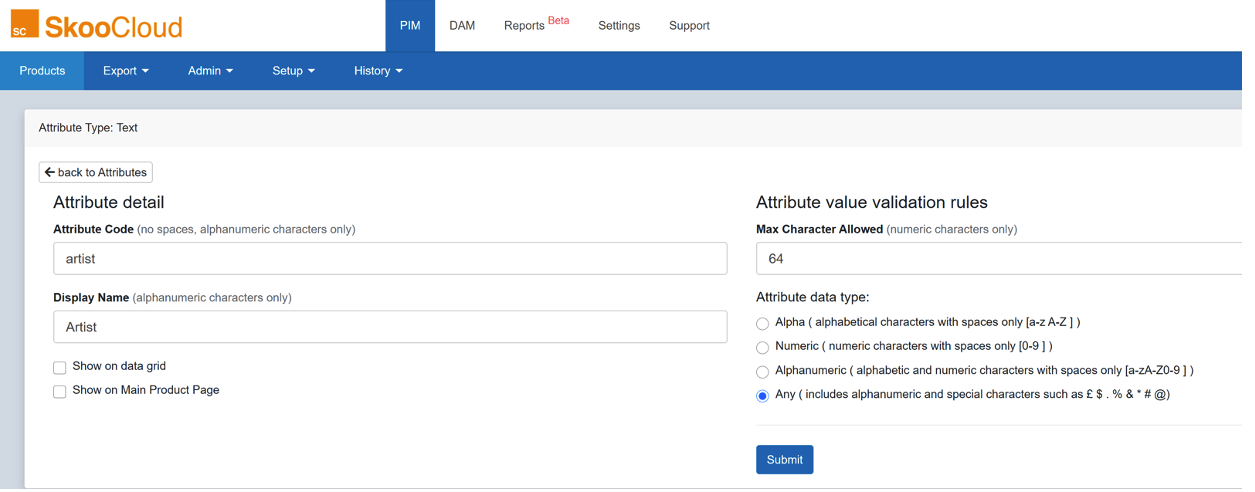
The next step is to set up your new attribute(s):
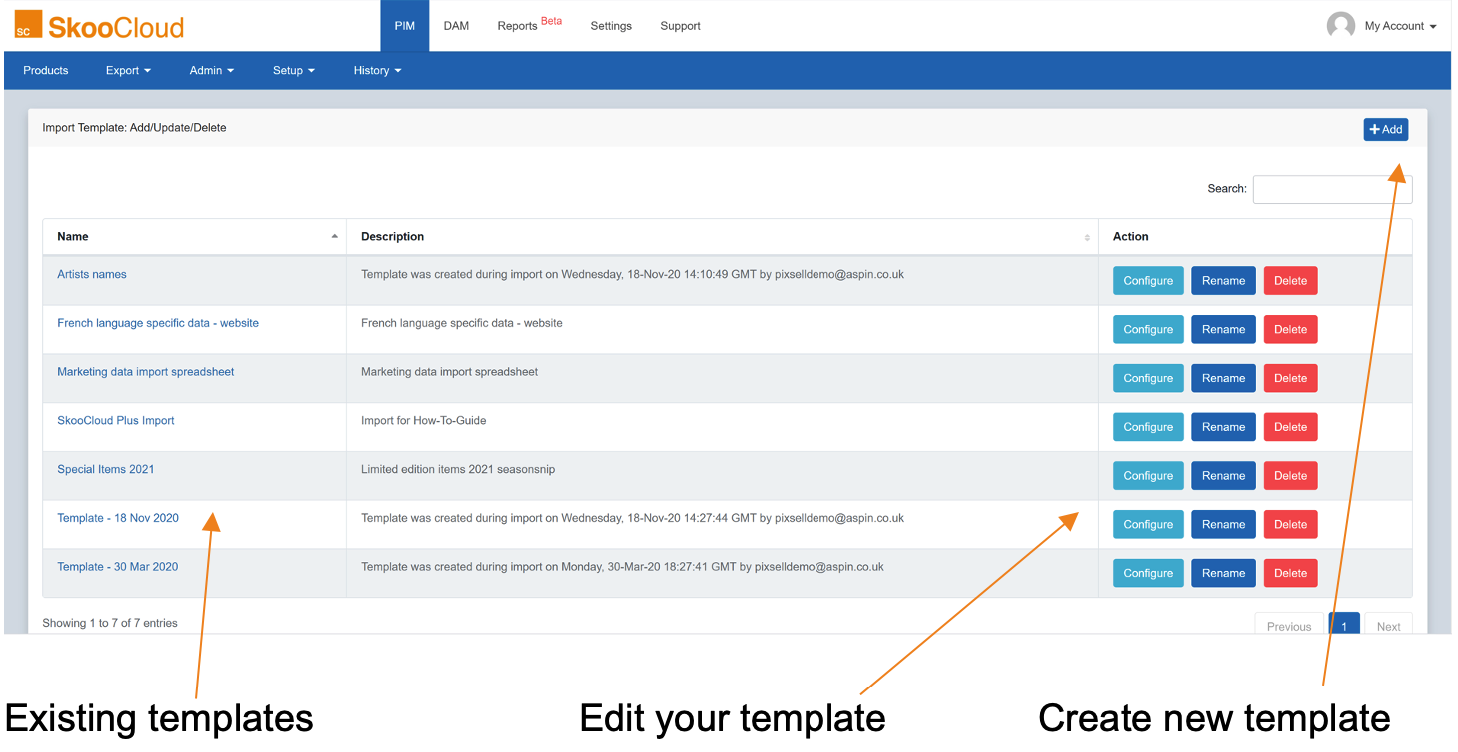
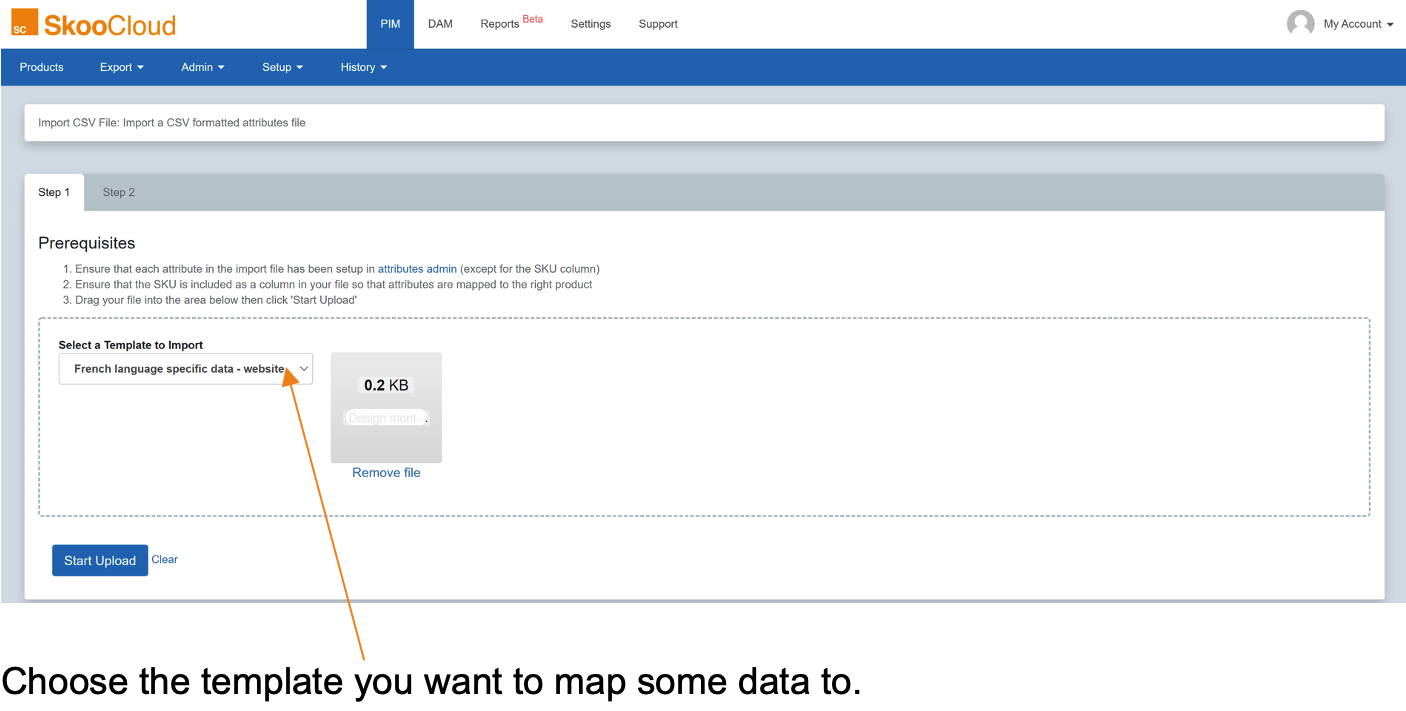
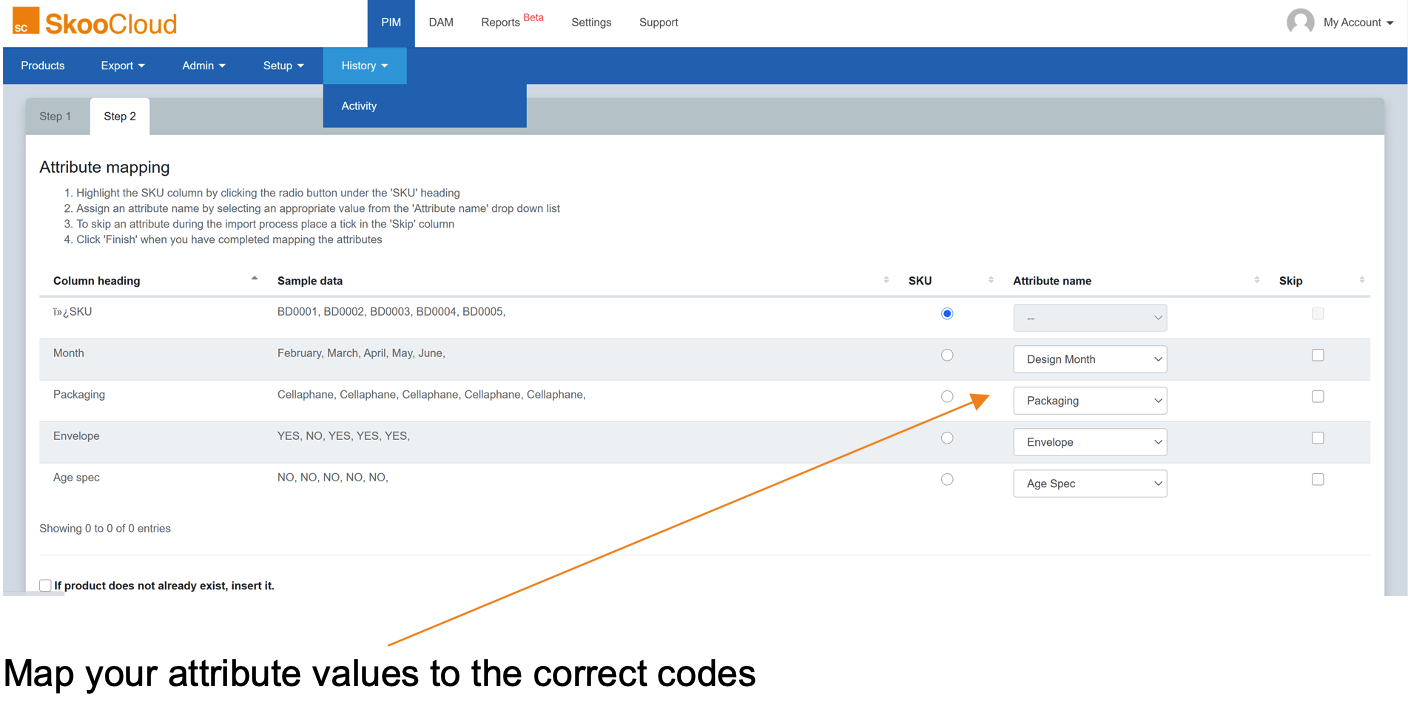
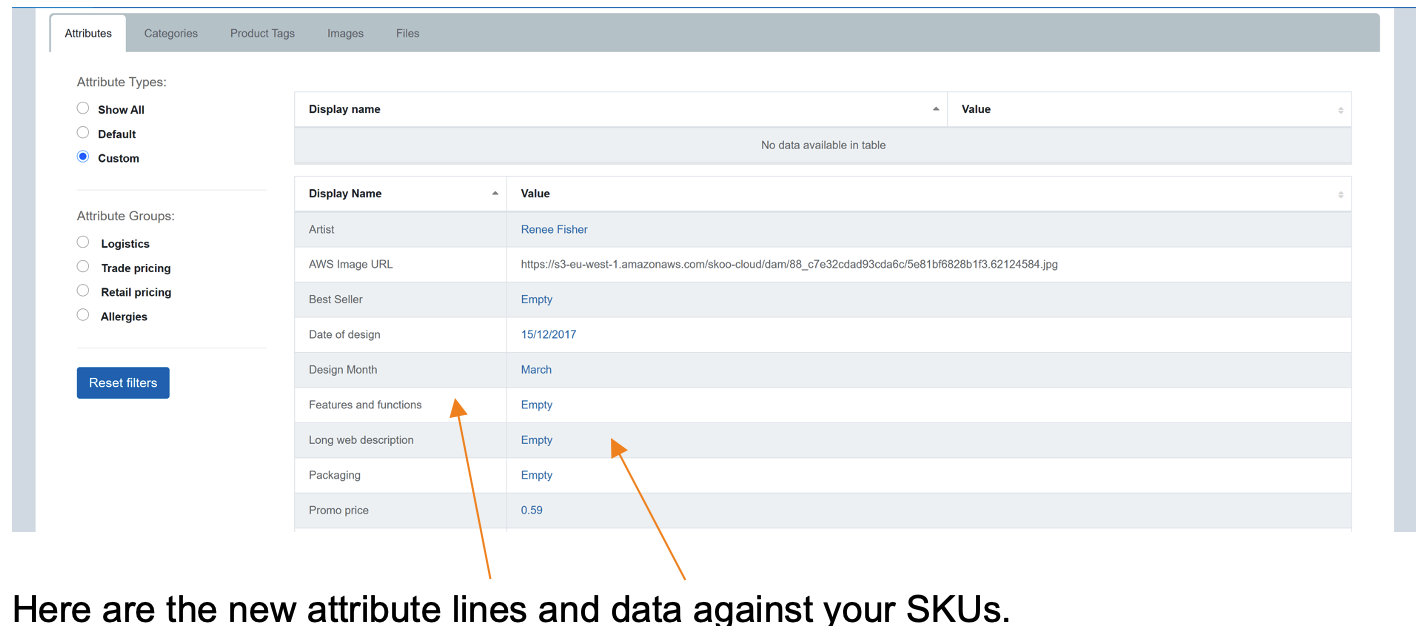
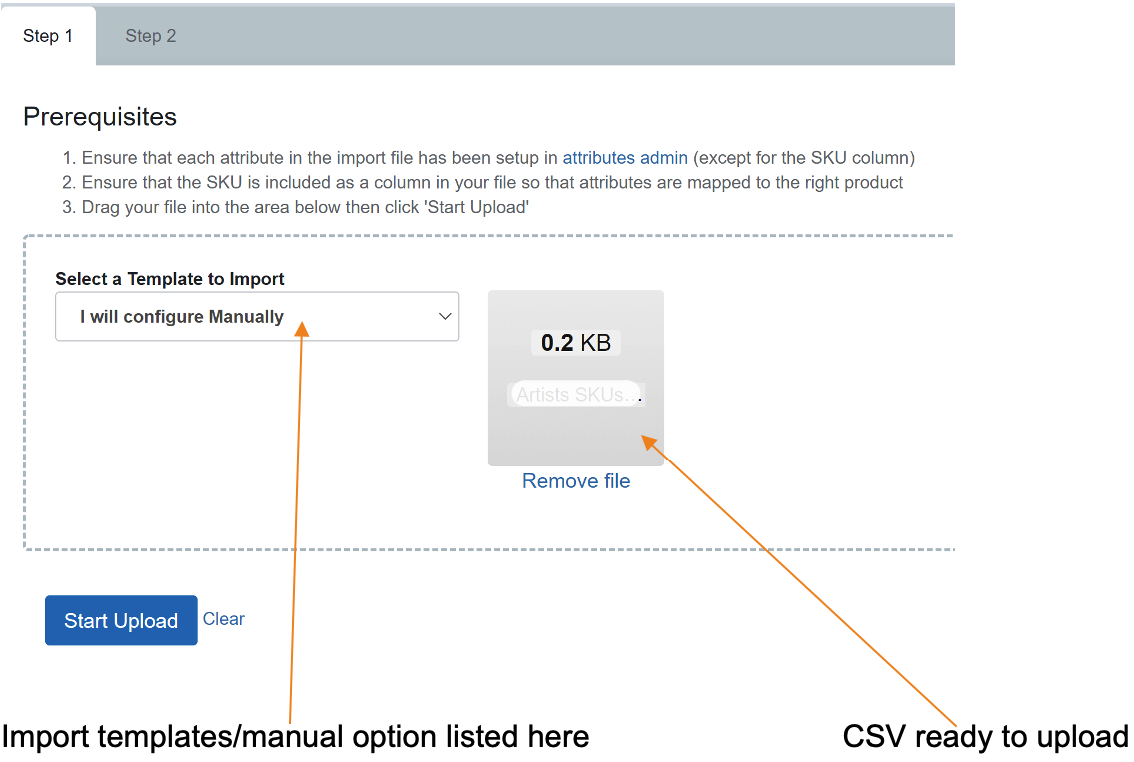
Under the Import tab, you will find two options; one for importing data via CSV files and one for creating templates to map your data to. Import templates are created by you and act as an entry point for importing custom data. Since this is a small data set, you can configure it manually on this occasion:
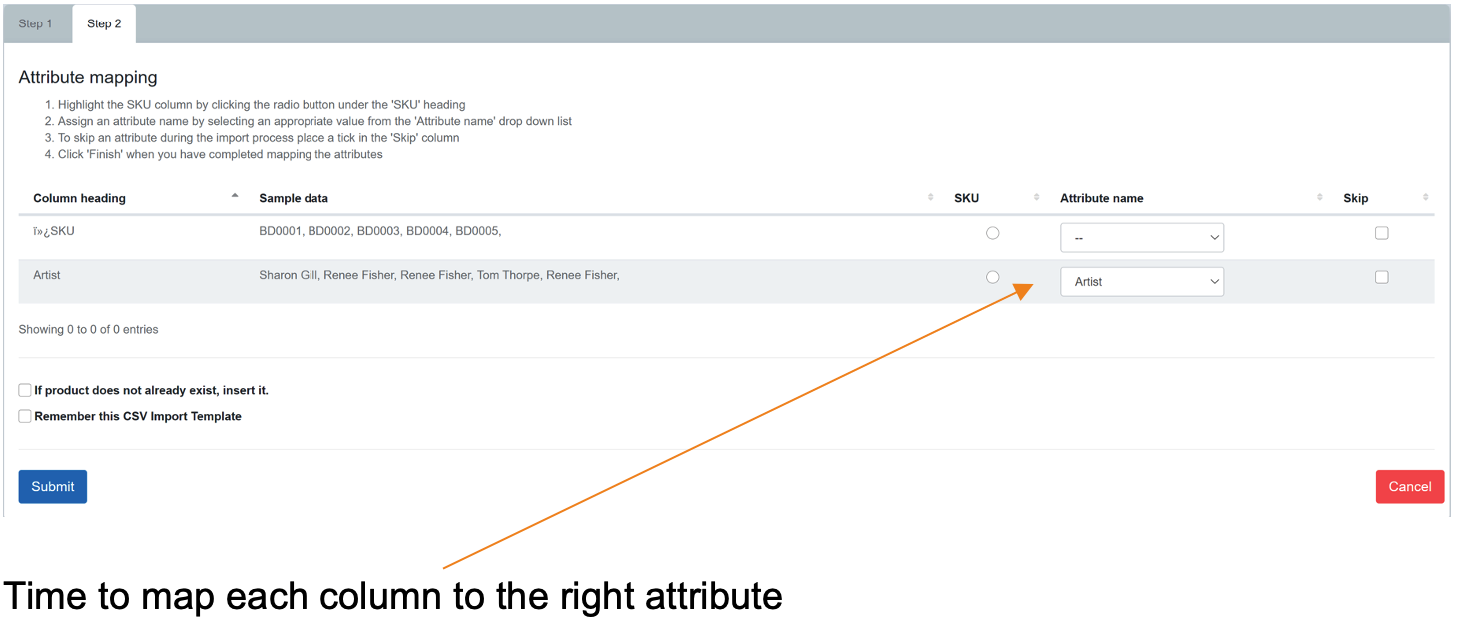
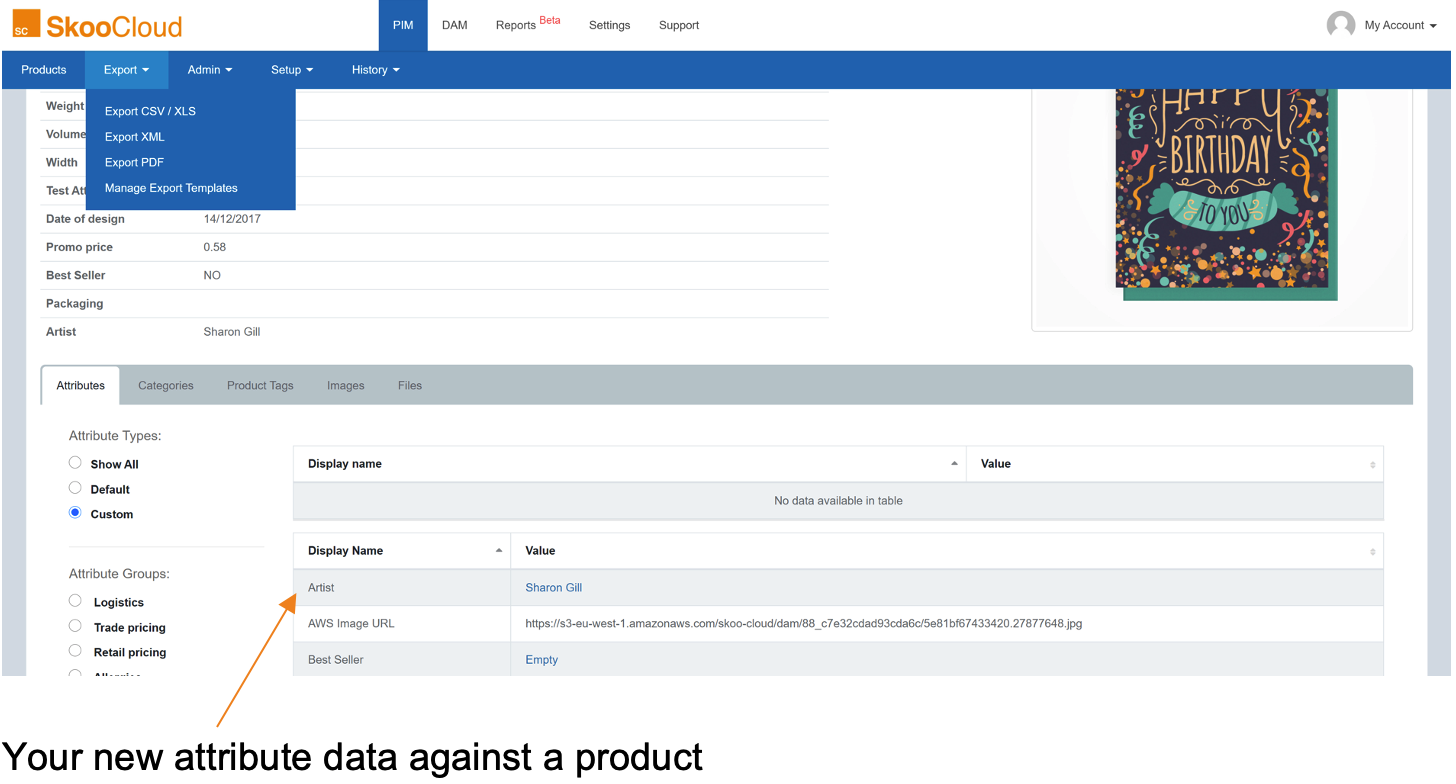
4.2.5 Import tools: Configuring a CSV import template
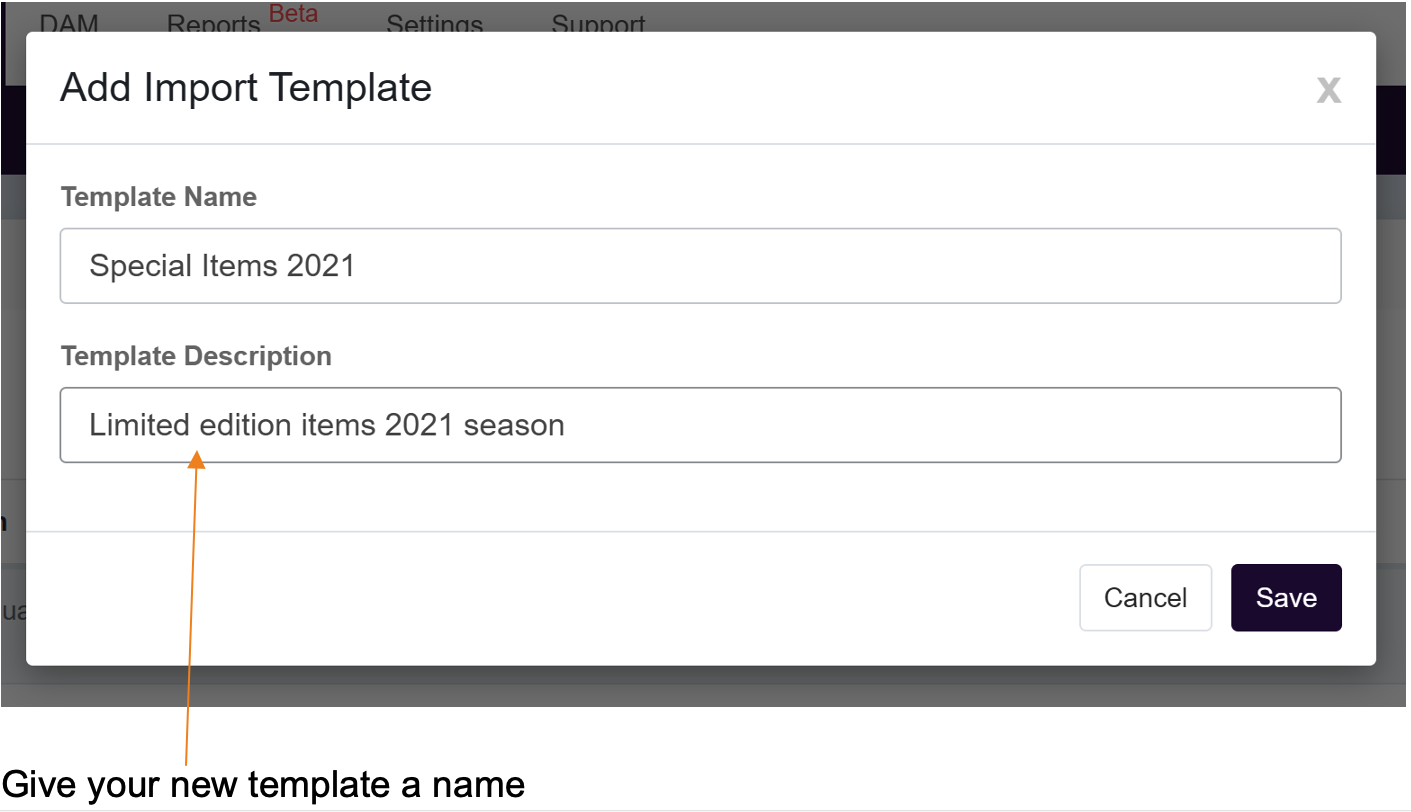
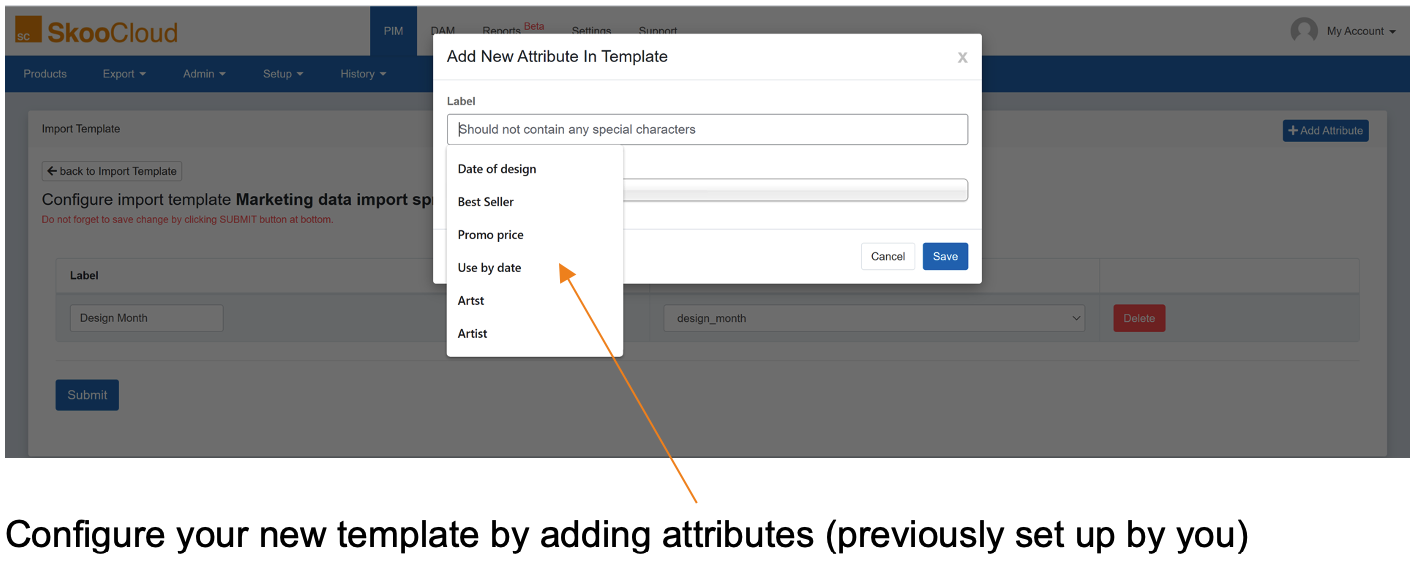
If you are looking to import a larger quantity of data, it may be an idea to configure a template to help you map the data. Once you have created all your custom attributes (see section 4.6), you can create an import template and select which of your custom attributes you’d like to include in your template. Here’s how to manually create an import template:
