6. Settings
Table of contents
Settings Overview
We’ve covered these in other sections, however here you will find areas to manage your users, their levels of access and your colour scheme.
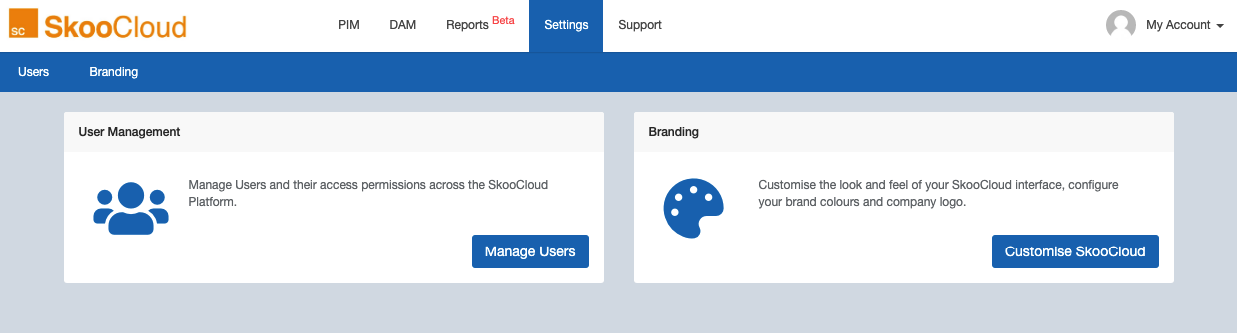
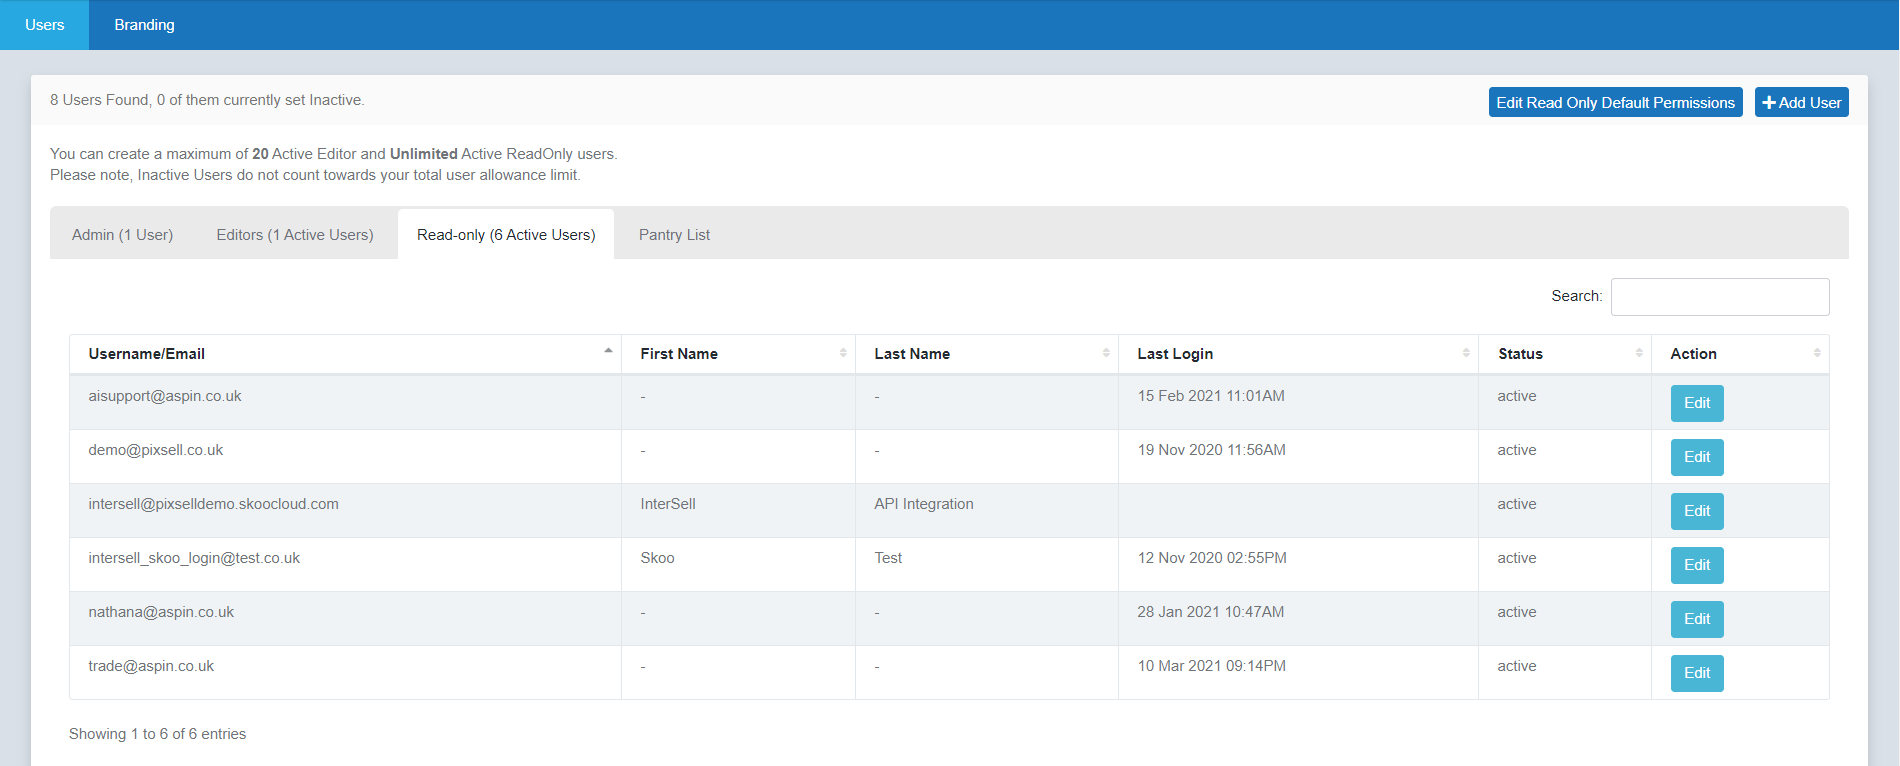
User Management
Here is where you can manage your user types.
Only admin can create new users or delete old users.
Editor Users
Editor users are typically the accounts you would create for people in your organisation who are in charge of maintaining data. In most cases this would just be your staff or contractors, but it can be anyone you trust.
Read-Only Users
Read-Only (RO) users are typically the accounts you would create for anybody you want to share your data with in a controlled and compliant way. This can be customers, retailers or suppliers.
PIM Attribute Permissions / Restrictions
Read-Only and Editor users can be set up with limited access to specific attributes. This is managed with the Attribute Groups function. You need to create an Attribute Group, e.g. Trade Pricing, add attributes to it and then set the user to have permission to access the attributes within this group.
Managing Attribute Groups is covered in section 4.4
RO and Editor users can be set to see everything, nothing or selected groups. The choices you have for the user is to let them see ALL attributes (existing and future) or limit what they see with Attribute Groups. If you use Attribute Groups to restrict what they see instead of offering them access to everything, you must assign them to at least one group or they will not be able to see any attributes in your PIM, since you assigned them nothing. Once again, the RO or Editor users can see everything, nothing or selected Groups. You can also set up a default permissions profile for new users which you will need to individualise later. This is managed via the ‘Edit Read-Only Default Permissions’ button in the top right-hand corner. Considerations when setting permissions:
- When an attribute is added or removed from an Attribute Group in the future, any RO or Editor user that has access to that Group will have access updated accordingly.
- Users can be set to ‘see all attributes’ in which case all Groups restrictions are avoided.
- Not adding a RO or Editor user to any Groups and not selecting ‘see all attributes’ will mean the user sees nothing.
- To get started, access your users via Settings > Users and select the “Read-Only” or “Editors” tab. Click ‘Edit’ against the user you want to manage. You can then edit the permissions for this specific user, opting to give them visibility of ALL attributes or selected groups.
Choose PIM Attribute Groups on the left and then choose ‘all’ or ‘selected’ access. Selecting ‘all’ will disable the Attribute Group options, and display all your attributes under visibility. Choosing ‘selected’ will activate the group options, removing the exhaustive list of attributes ready for you to specify.
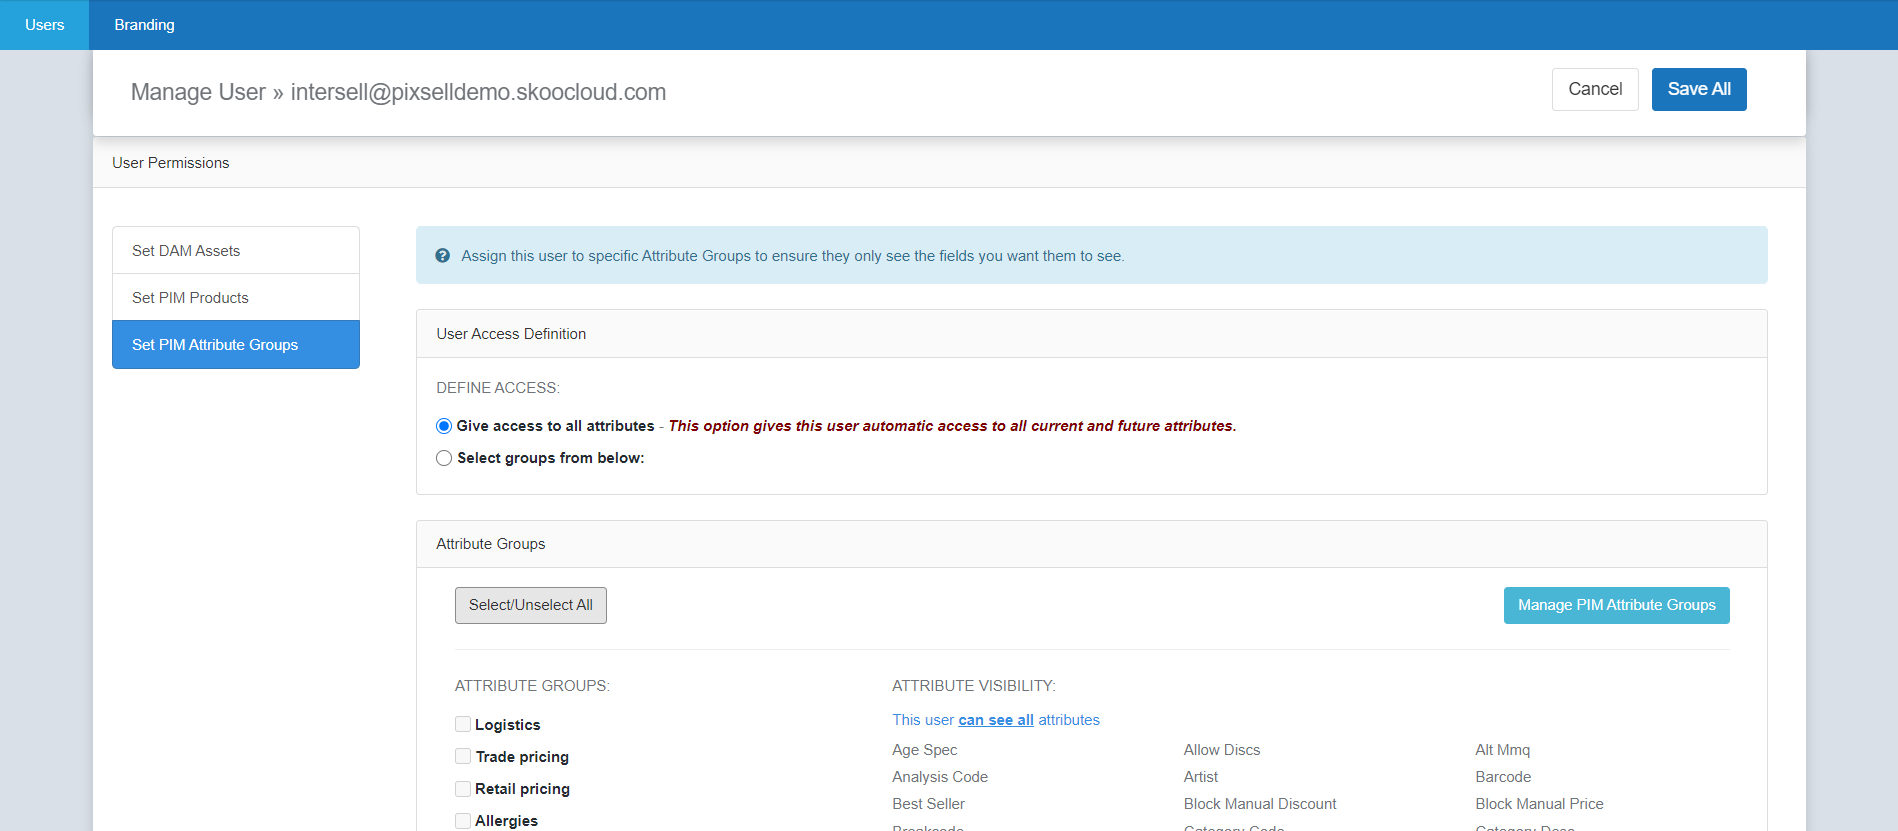
Each time you tick one of the attribute group boxes, the attribute visibility pane will populate with the attributes from the checked group. You can check all boxes if you wish. For ease, there is a shortcut button to take you to the Attribute Group page to create, edit or delete any of these groups.
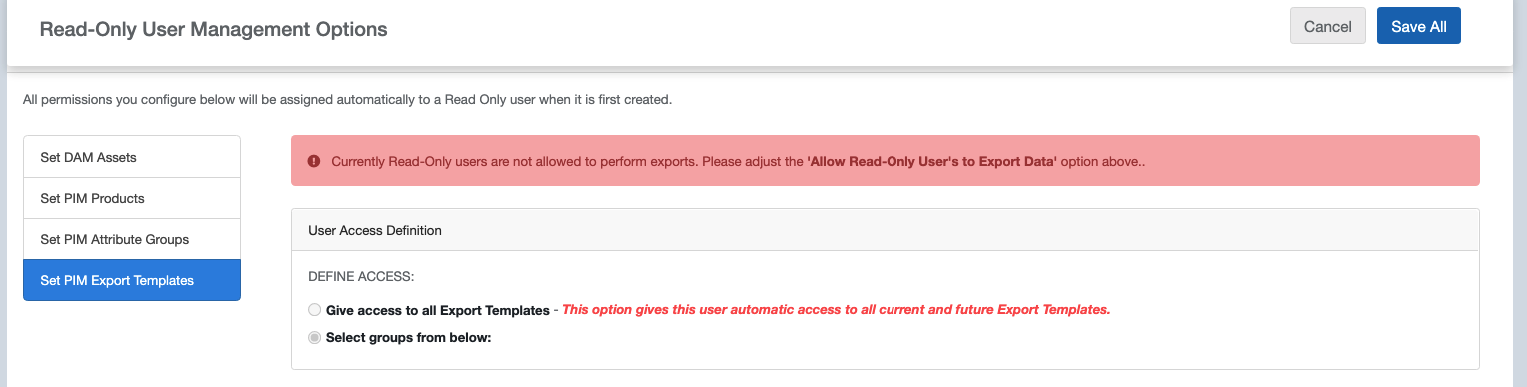
PIM Export Permissions / Restrictions
Read-Only users can have their access to specific export templates restricted. This is managed within the User Management screen.
For this functionality to work, you have to enable your read-only users to be allowed to export data from your PIM system. You can set this in Settings > Users -> Edit Read Only Default Permissions.

When this option is not set, you will see a message like the one below and these permissions will not be editable from the users screen.
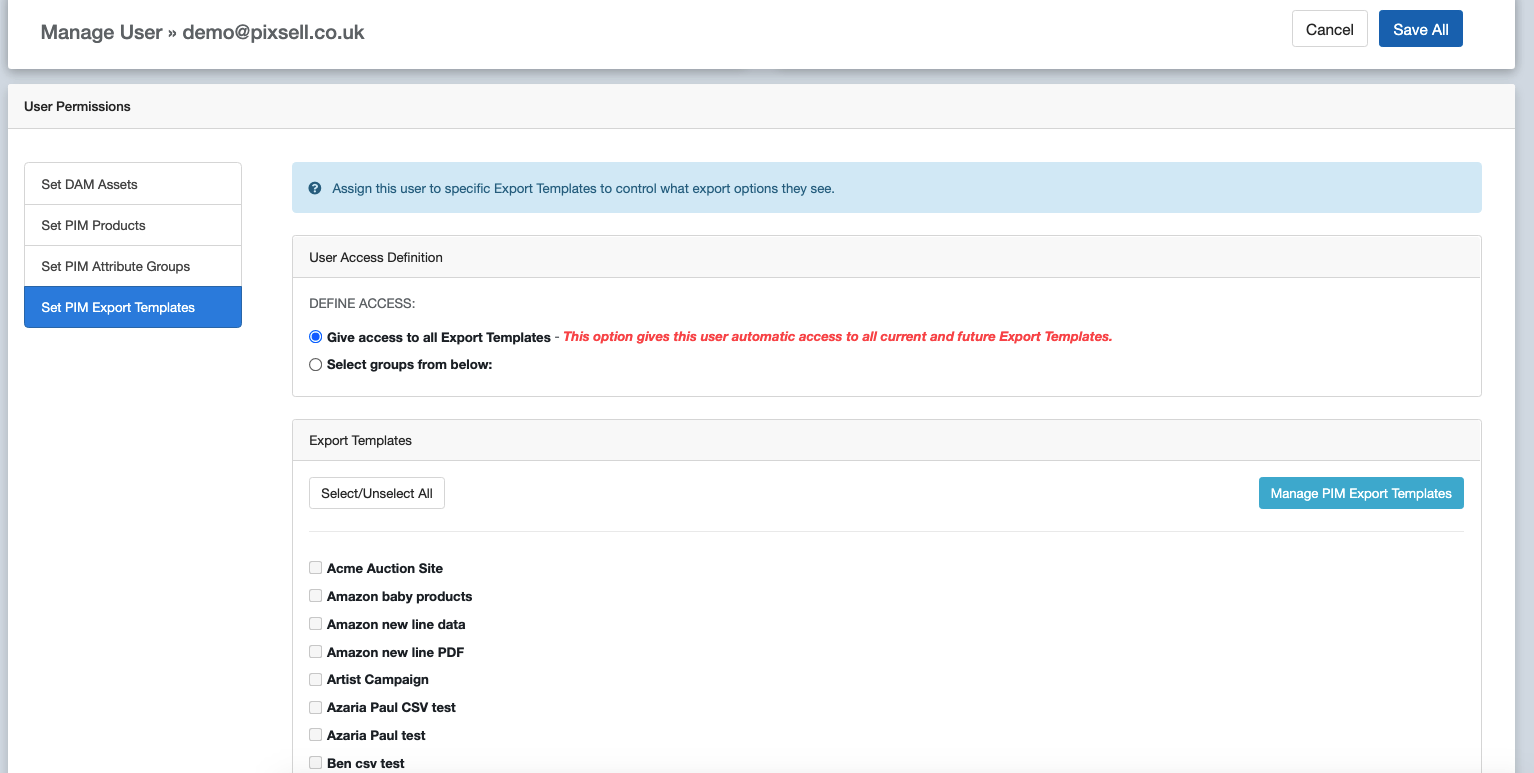
The choices you have for a RO user is to let them see ALL export templates (existing and future) or limit what they see. If you restrict what they see instead of offering them access to everything, you must assign them to at least one template or they will not be able to see any export templates in your PIM, since you assigned them nothing. In summary, RO users can see everything, nothing or selected Export Templates. You can also set up a default permissions profile for new users which you will need to individualise later. This is managed via the ‘Edit Read-Only Default Permissions’ button in the top right-hand corner.
Considerations when setting permissions:
- Not adding a RO user to any Export Templates and not selecting ‘see all attributes’ will mean a RO user sees nothing.
- To get started, access your users via Settings > Users and select RO users. Click ‘Edit’ against the user you want to manage. You can then edit the permissions for this specific user, opting to give them visibility of ALL attributes or selected Export Templates.
Choose PIM Attribute Groups on the left and then choose ‘all’ or ‘selected’ access. Selecting ‘all’ will disable the Attribute Group options, and display all your attributes under visibility. Choosing ‘selected’ will activate the group options, removing the exhaustive list of attributes ready for you to specify.
Each time you tick one of the attribute group boxes, the attribute visibility pane will populate with the attributes from the checked group. You can check all boxes if you wish. For ease, there is a shortcut button to take you to the Attribute Group page to create, edit or delete any of these groups.
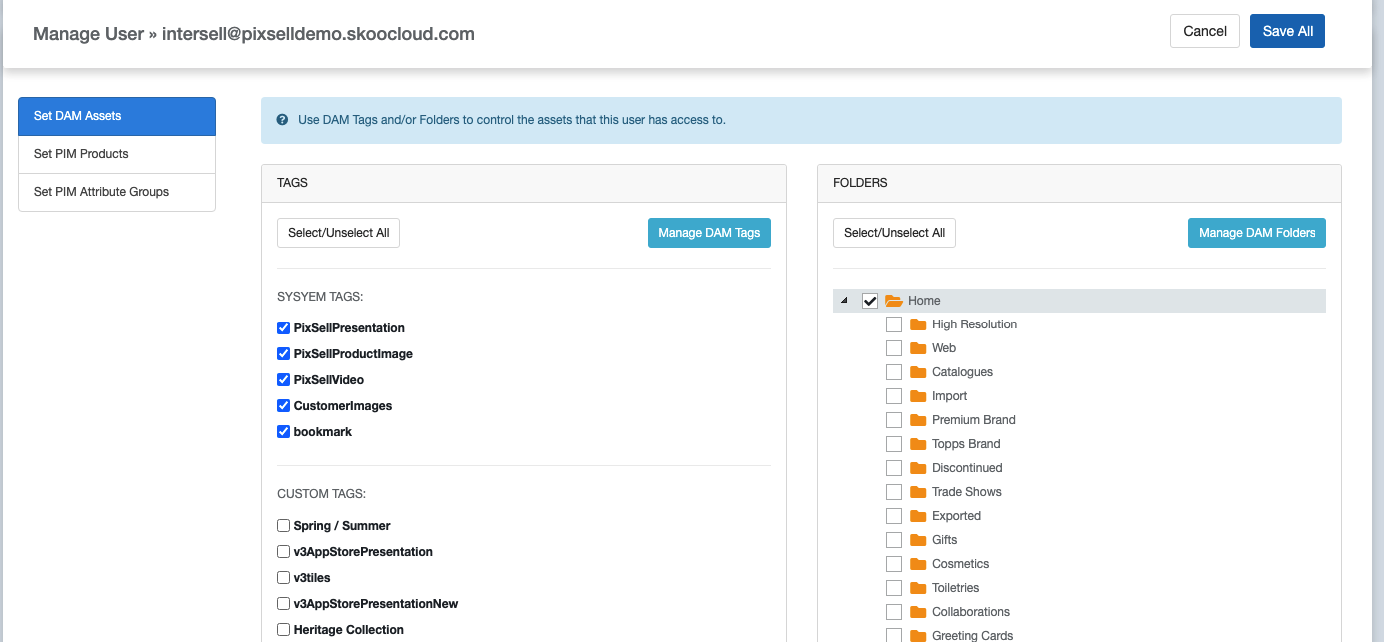
Manage DAM Tag & Folder Access
Folders are named and sit within nested locations for your product assets. Tags can be applied to assets to associate assets together from multiple folders. For example, you may wish to tag some products with ‘2021’ that reside in two different folders; ‘Giftware’ and ‘Trade Shows’.
You can create multiple users within your SkooCloud environment – one ‘Admin’ and subsequent ‘Editors’. Your administrator can set up viewing permissions on login credentials for your audience via the Settings tab. For example, you may decide that a specific customer that has access to your SkooCloud account should only see the assets associated with items they buy from you. Another scenario might include a supplier logging in – and they should only see the assets associated with the SKUs that they supply to you, and not products from competing suppliers.
Manage PIM Tag & Category Access
Your administrator can set up viewing permissions on login credentials for your audience. For example, you may wish a customer that has logged into your SkooCloud account to only see the assets associated with items that they stock in your retail store. Another scenario might be a supplier logging in – and they should only see the assets associated with the SKUs that they supply to you.
In certain scenarios, you may not desire a Read-Only user to be restricted to a sub-set of products via tags and categories and wish for them to be granted access to all products, current, past and future. For this use-case you can use the All Products option from the permissions screen below: 
Once you click the ‘save’ button, these permissions will be applied through the front-end of the system, with immediate effect.
Editors
Editors are a user level that you would typically use for your own staff. Editors can see, edit, import and export all data within the PIM & DAM. You may also grant them permissions for reports.
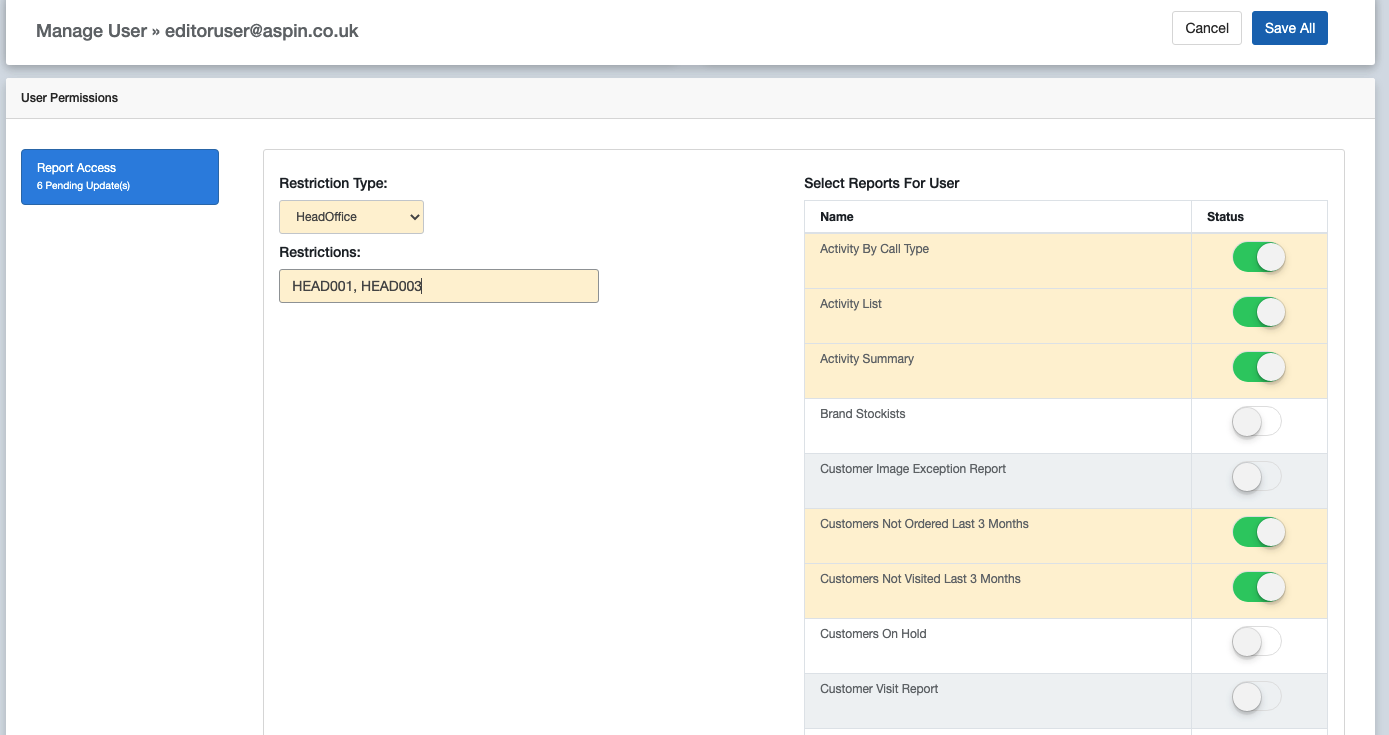
Manage Report Access
If you are unsure as to which restrictions a user has, you can run a report on their user name, as below.
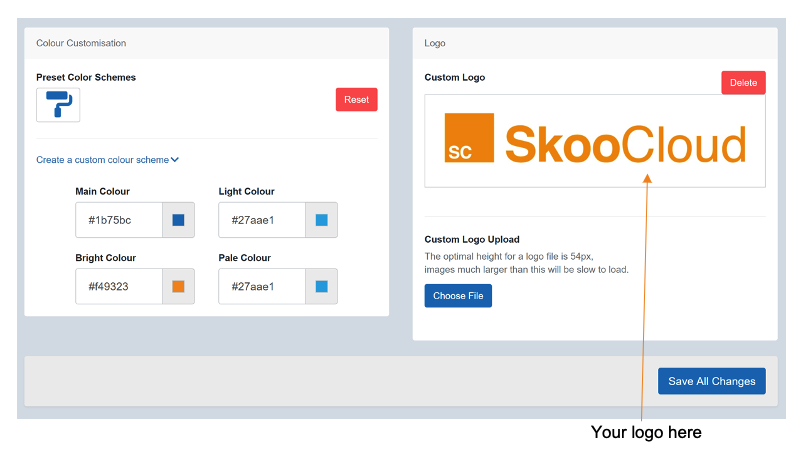
Branding
During setup, your administrator will be prompted to upload your company logo and apply your colour scheme to the user interface. Much like your InterSell and PixSell systems, your aim should be to provide your customers and users with a ‘<your company/brand> centric’ platform, rather than an Aspin branded tool.
This can be modified at any time within this Branding section.